


Hi Community members,
Happy Monday! Hope you had a well-rested weekend and are ready to kick-off a brand new week. To help get you ready, today I want to (re)introduce you to one of our great features: TeamLink. Hope you're ready, there's some interesting stuff coming your way and I'm really looking forward to getting your thoughts on this.
1.Learn how to take advantage of TeamLink
What is TeamLink?
If you haven’t heard of it, Team Link is a feature that utilizes the power of your entire team's network to help you find the best path to a lead by showing you Sales Navigator license holders on your team account who are 1st-degree connections to the lead, even if you're not connected to your teammate. With this information, you can easily see who can help you connect with potential leads and make a warm introduction. And, what’s the best part of it? Your teammates will also have the same access to your connections! One quick/important note: this is a feature that it’s only available for customers who have a Sales Navigator Advanced or Advanced Plus plan.
How can you leverage TeamLink?
The Sales Spotlight feature for TeamLink connections allows you to target prospects with the best suggested path. By default, TeamLink is enabled in the Settings menu located below your profile picture dropdown. Learn more about how to manage your TeamLink settings in Sales Navigator.
This said, you can secure introductions through TeamLink by finding out common connections and skipping cold calls. Team Link allows you to get a warm introduction to prospects beyond your first-degree network by leveraging mutual connections. If you want to do it, once you’ve found the lead, you just need to visit their SN lead profile, click the (Ask about) button in your TeamLink panel to send a message to a member, and ask for an introduction to a common connection.
2.Understand how TeamLink Groups allows you to expand your poll of quality leads and warm introductions
What are TeamLink Groups?
TeamLink Groups, or cross-contract TeamLink, expands TeamLink by introducing the ability to connect multiple Sales Navigator contracts or multiple dashboards under one or more contracts. By connecting multiple dashboards, you may represent additional regions, subsidiaries, or functions of your organization.
A couple of things to keep in mind as you activate TeamLink Groups:
- This feature is only available to Advanced and Advanced Plus plans.
- Dashboards can only be a part of one TeamLink Group.
- TeamLink Groups cannot be self-activated and must be activated by LSS Support.
- For TeamLink Groups, the individuals representing each company and signing the Data Sharing Agreement acknowledge that they are authorized to do so.
- Just like regular TeamLink, if a member opts out of TeamLink then their contribution to the Teamlink network will not be shown for any contract or dashboard.
How can you set up TeamLink Groups?
- Contact our support team and request to have TeamLink Groups activated for your account.
- A support representative will reach out to you within 48-72 hours to confirm your request. You may be provided with additional documentation that will need to be filled out to process the request. All associated contract owners will need to sign a new data sharing agreement form when adding any new contracts to the Group.
- Send completed forms back to our support team and TeamLink Groups will be initiated within 48-72 hours.
3.Leverage TeamLink Extend by inviting people in your organization that don’t have a Sales Navigator license
What is TeamLink Extend?
TeamLink Extend allows companies to increase the size of their TeamLink networks without giving members full Sales Navigator capabilities. TeamLink is a feature of LinkedIn's Sales Navigator product that allows Sales Navigator users to leverage the power of an entire team's network to find the best paths to leads and accounts. Learn more about the TeamLink feature in Sales Navigator.
How can Sales Navigator’s Admins assign and remove a TeamLink Extend seat?
First, please understand that to manage and assign seats for TeamLink Extend, you'll need to be an admin on a Sales Navigator Advanced or Advanced Plus contract. To assign seats for TeamLink Extend, you just need to:
- Sign in to Sales Navigator.
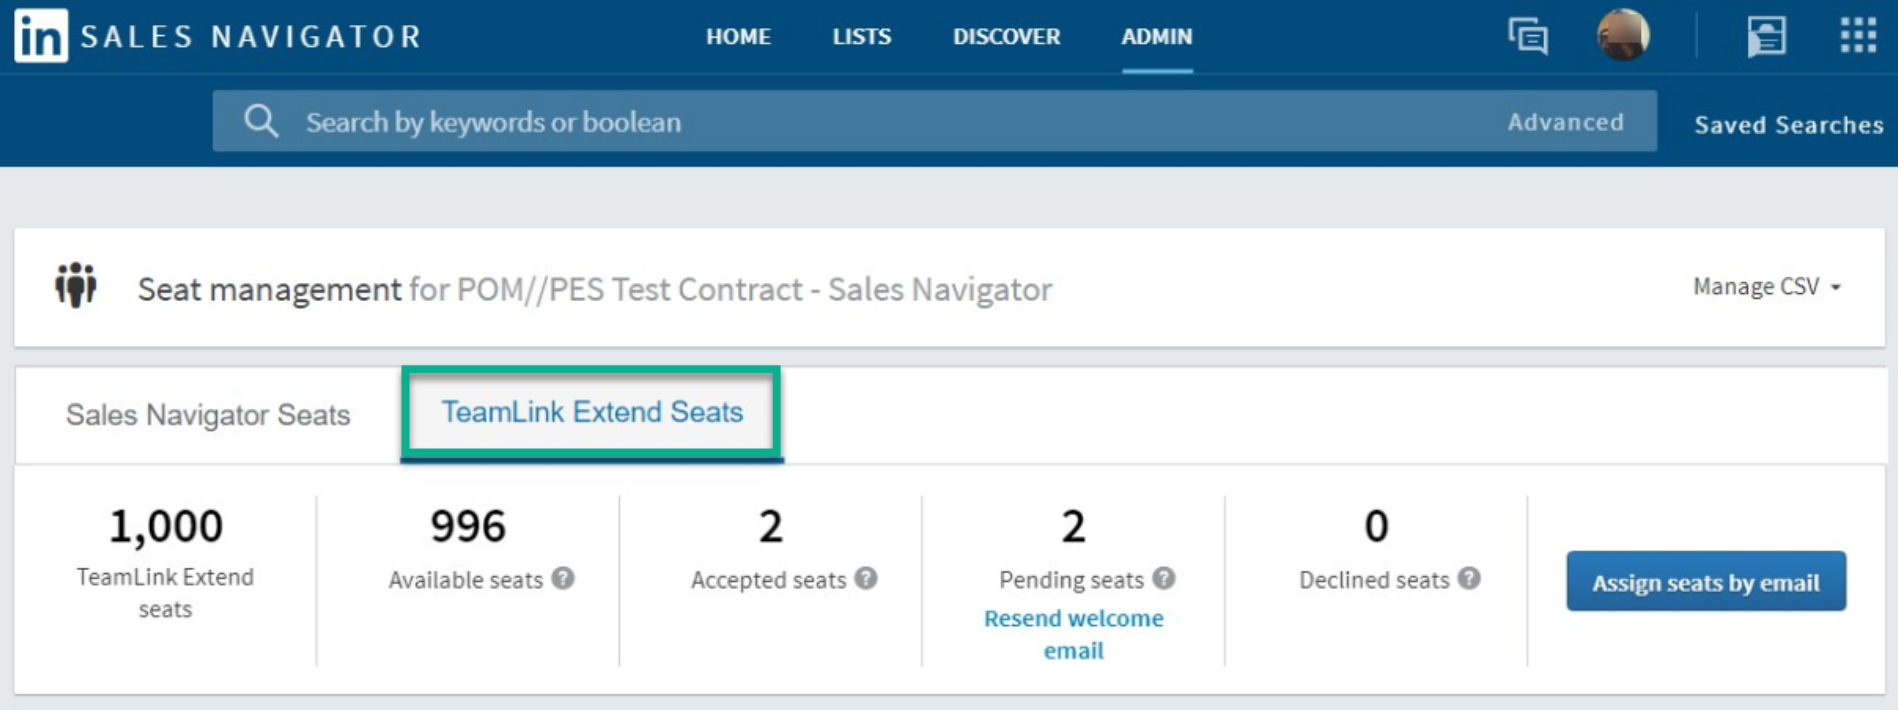
- Move your cursor over Admin at the top of the page and select Seat Management from the dropdown.
- Select the TeamLink Extend Seats tab.
- Click Assign seats in the top section of the page.
- Follow the prompts to complete assigning seats.
- Select Assign.
To remove a member from TeamLink Extend, select Edit to the right of their name on the TeamLink Extend Seats page and then click Remove from the dropdown.
What happens when users receive a TeamLink Extend seat?
If anyone is given a TeamLink Extend seat, they’ll receive an email invitation that they can accept or decline. They can also manage TeamLink Extend from their Settings & Privacy page on Linkedin.com. Accepting the invitation means Sales Navigator users at their organization can see if they are connected to people they are searching for, and request an introduction from them. No other information is shared with their dashboard.
If users received an email invitation to join TeamLink Extend from a Sales Navigator user, they can click Opt in Today on the invitation to join the TeamLink program. Clicking Opt in Today allows individuals at their organization with Sales Navigator licenses to extend their organization's network by viewing who they are connected to on LinkedIn. Once they accept the invitation, there's no further action required from them.
How can TeamLink Extend users turn their seat on and off?
Invitations to join TeamLink Extend will be indicated in the TeamLink Extend section of your Settings & Privacy page on LinkedIn.com from where you can accept or decline. Additionally, you can turn TeamLink Extend on or off at any time, even after you accept an email invitation to join the program.
To manage your TeamLink Extend settings:
- Sign in to LinkedIn.com.
- Click the Me icon at the top of your LinkedIn homepage.
- Select Settings & Privacy from the dropdown to go to your Settings & Privacy page.
- Select the Account tab at the top of the page.
- Under the Partners and services section of the Account tab, click Change next to TeamLink Extend.
- Switch the toggle to the left or right to turn TeamLink Extend on or off.
Turning TeamLink Extend off will mean that Sales Navigator users at your company won't have access to your LinkedIn connections when trying to find valuable leads and accounts.
I really hope you’ve found this Community post helpful and that, in case you’re not leveraging this feature yet, you’ve discovered all the key benefits that TeamLink offers you and your organization. If you’re already leveraging it, please let us know how you’re taking advantage of it and share any win you’ve had with it.
I can't wait to hear your feedback and TeamLink success stories! 😊
Nádia


