


Hi Program Managers and Admins,
Earlier this month, I mentioned Account Center in my post on how to provision and activate all your Sales Navigator licenses. Account Center allows Admins to
- Effectively manage seats and permissions for one or more licenses
- Communicate at scale with bulk emails to users and Groups
- Experience seamless navigation between LinkedIn dashboards from a single, centralized location.
Today, we are going to dive further into how you can maximize its features and all you need to know about Account Center!
Accessing Account Center
1. Before we begin, make sure that you have an Admin seat/permission in Sales Navigator. If so, you should see "Admin" at the top right of the navigation bar.
2. This takes you to Admin Home as you see below. Then, click "Account Center."
3. Once in Account Center, you will see the four tabs at the top: PEOPLE, SETTINGS, ADMIN HOME, and REPORTS.
*Pro-tip: If you don't see Account Center in Admin Home, you can access it directly here: https://www.linkedin.com/accountcenter/sales/users2/i>
The PEOPLE Page
In short, the People page allows Admins to organize all users and groups in your Sales Navigator license. You will see that within this page, there are three subpages: Users, Groups, and Admins.
- Users: For more details on how to provision a Sales Navigator license (individually or in bulk) and manage the users once added, make sure you read this post.
- Groups: With groups, you can easily and quickly perform assign licenses to users in your contract and set their permissions. Another benefit is that Admins can use Groups in Usage Reporting to track team activity/performance. To create a group, simply click “Create new group” on the right (see screenshot below). Like provisioning licenses, you can also add users to groups individually or in bulk. To learn more about how to add members to Groups, find the details here.
- *Pro-tip: Another great but little known feature is the ability to bulk update Groups via CSV.
- Admins: On this page, permission can be assigned to Program Managers like yourself or your organization’s leaders, and each type of permission determines what functions they can perform in Sales Navigator. To assign Admin permissions or edit current permissions, click on the [ • • • ] on the right of their name and select “Manage permissions” (see screenshot below).
Now, here is what each type of permission means:
- Full Admin:
- Can provision Sales Navigator licenses and create groups
- Can unassign SN licenses or resend invitation emails
- Grant Full Admin and Sub Admin permission to users
- View and generate reports
- Sub Admin:
- Can provision Sales Navigator licenses
- Can unassign SN licenses or resend invitation emails
- View and generate reports*
- User: Sales Navigator access only
*Note: Sub Admin in Sales Navigator really only has the ability to view and generate reports. The other two features are available for Sub Admins in our LinkedIn Talent Solutions and LinkedIn Learning applications.
If you need more information on managing Admins and granting/editing permissions, check out this Help page. Finally, with our latest Q3 product update, completing bulk actions in Account Center is now faster and more intuitive. Admins can now quickly and easily locate and select up to 2000 users to take immediate bulk actions, such as group and permission management, within the new User Queue.
The REPORTS Page
This takes you back to the "Usage Reporting" page, which offers an overview of the activation status of your Sales Navigator account as well as its usage and effectiveness by your users. The screenshot below shows the “Overview,” but you can access the “Usage” and “Effectiveness” tabs easily as well. The reporting includes activity from both LinkedIn.com and Sales Navigator to ensure all selling activity is reflected. The activity recorded may take place on desktop as well as on mobile, email, or CRM applications*.
For Usage, here are the activity and metrics reported:
- Days active
- Searches performed
- Profile views
- Saved leads
- Saved accounts
For Effectiveness, here are the activity and metrics reported:
- InMail messages sent
- InMail acceptance rate
- Messages sent
- Total unique connections
- Smart Links created (New!)
- Smart Links viewed (New!)
For a comprehensive breakdown of each of the metrics above and how you select specific date ranges as well as filter out Users and Groups, check out this wonderful post by @Nadia Vieira.
*Pro-tip: If you have the Advanced Plus plan for Sales Navigator, you can choose to view this data in Tableau, PowerBI, and InsightSquared as well.
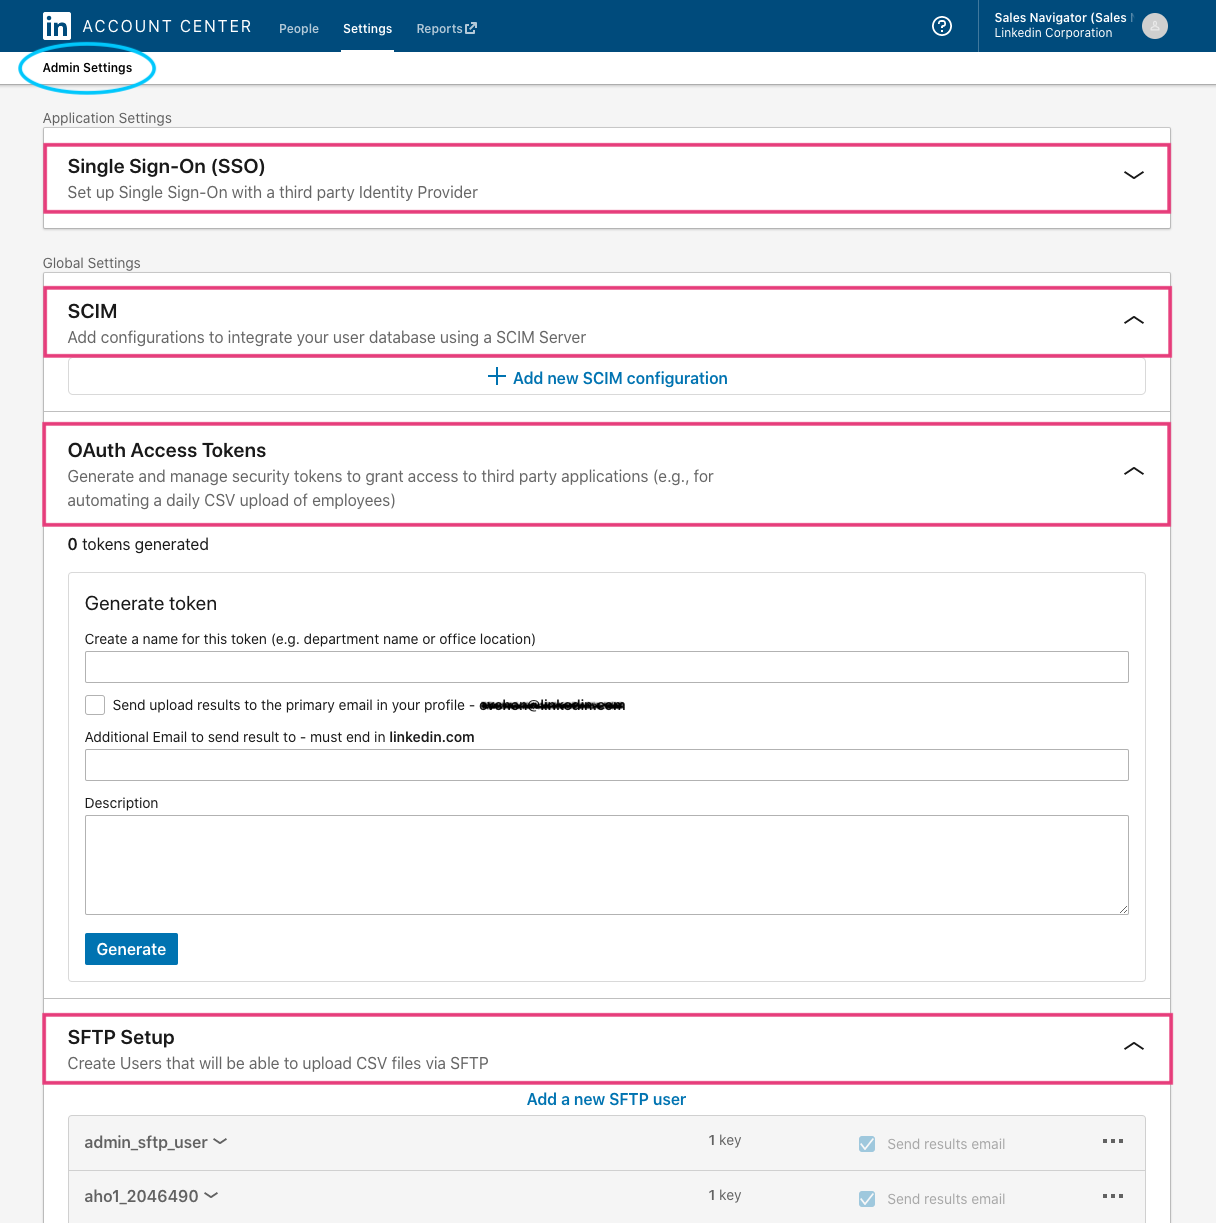
The SETTINGS Page
On this tab within Account Center, Admins can customize CRM Sync* settings and manage Single Sign-On (SSO) integration from within your account. As you can see boxed in pink, you can authenticate users with SSO, add or edit existing access tokens to third-party applications, and more. If you would like to enable other settings in your Sales Navigator contract (i.e. ROI Reporting, InMail and Messages, TeamLink*, and Smart Links*), click “Admin Settings” at the top (circled in blue).
*CRM Sync and CRM capabilities are available to only the Advanced Plus plan, while TeamLink and Smart Links are available to Advanced and Advanced Plus plans.
For detailed information on each of the following Applications and Global Settings below, check out this Help page.
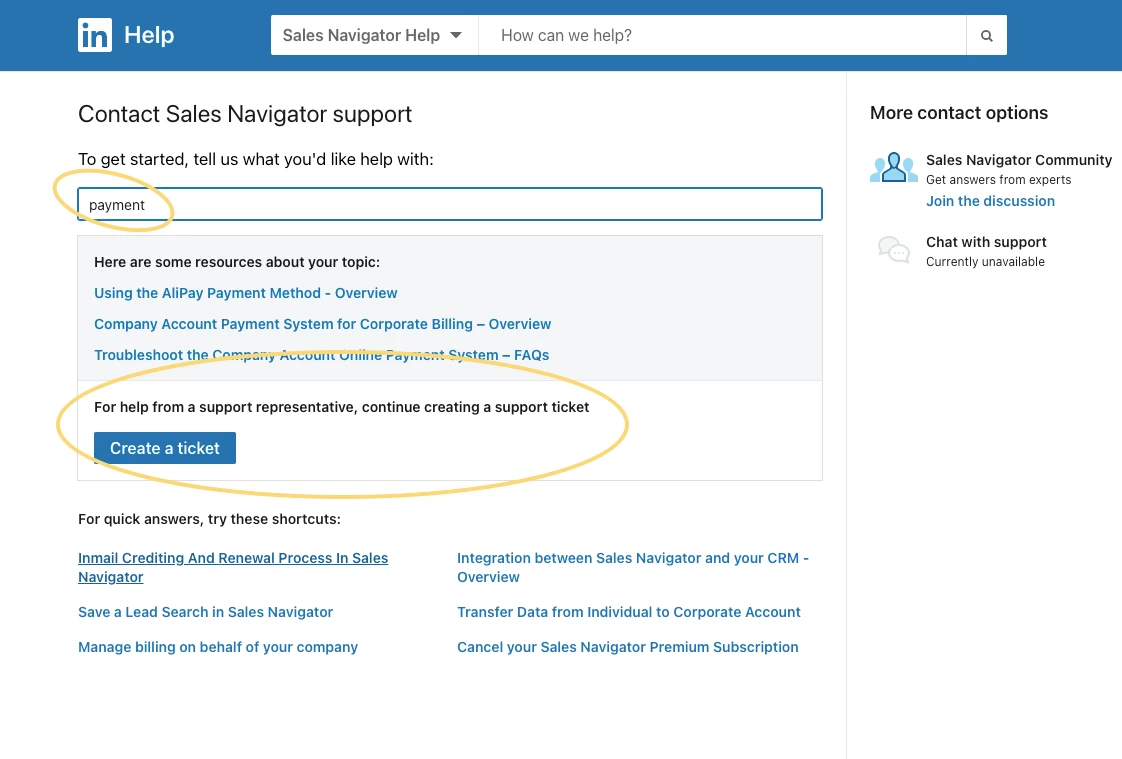
Hope this was a helpful overview of how Admins can utilize Account Center fully. If you have any questions on the above or need further assistance, feel free to reach out.
Thank you and happy selling!
Eva C.


 Maybe this is due to the situation that we still have disconnected Sales Na. licenses?